

by J.M., Survival Blog:
(Continued from Part 1.)
There are two additional items required to run a Raspberry Pi – a microSD card for storage and a power supply. I’ve set up, configured and run dozens of Raspberry Pis since they came out in 2012, and 90% of all of the problems I’ve ever encountered with them are the result of either a bad microSD card or inadequate power supply, so you don’t want to cheap out on either.
TRUTH LIVES on at https://sgtreport.tv/
For the microSD card I strongly recommend using a SanDisk MAX ENDURANCE model of at least 64GB, but bigger is always better, so get a 128GB or even a 256GB one if you can afford it. For a power supply you’re going to need something that can supply a clean 5V/2.4A via microUSB for either of the Pi 3 models, or 5V/3A via USB-C for the Pi 4 model. Note that the AC power supply is just for initially configuring the Raspberry Pi – I’ll be talking about how to power your entire setup using a battery power supply later on.
One of the limitations of microSD cards is that they were never designed to handle the types of read and write loads that operating systems generate, so they can be slow and they’ll ‘wear out’ after a couple of years of hard use. One alternative is to configure your Raspberry Pi to boot from an external SSD storage device, which is a lot faster and can provide a lot more storage. I have mine configured to boot from a 240GB JOIOT Mini Portable SSD and use a 2TB Western Digital Elements SE SSD for extra storage, which provides a ton of store for reference content, videos, pictures, etc.
If you want to use an external SSD (Solid State Disk), here are some instructions on how to set that up – ‘How to Boot Raspberry Pi 4 From a USB SSD or Flash Drive’. For this article, I’ll just assume that you’re starting with a microSD card. Note that it’s also possible to use an inexpensive high-capacity USB thumb drive for either the boot/store device (in place of the microSD card), or as supplementary external storage, but as with microSD cards, USB thumb drives tend be be slower and less reliable, whereas SSDs are designed to behave just like spinning disks but a lot faster.
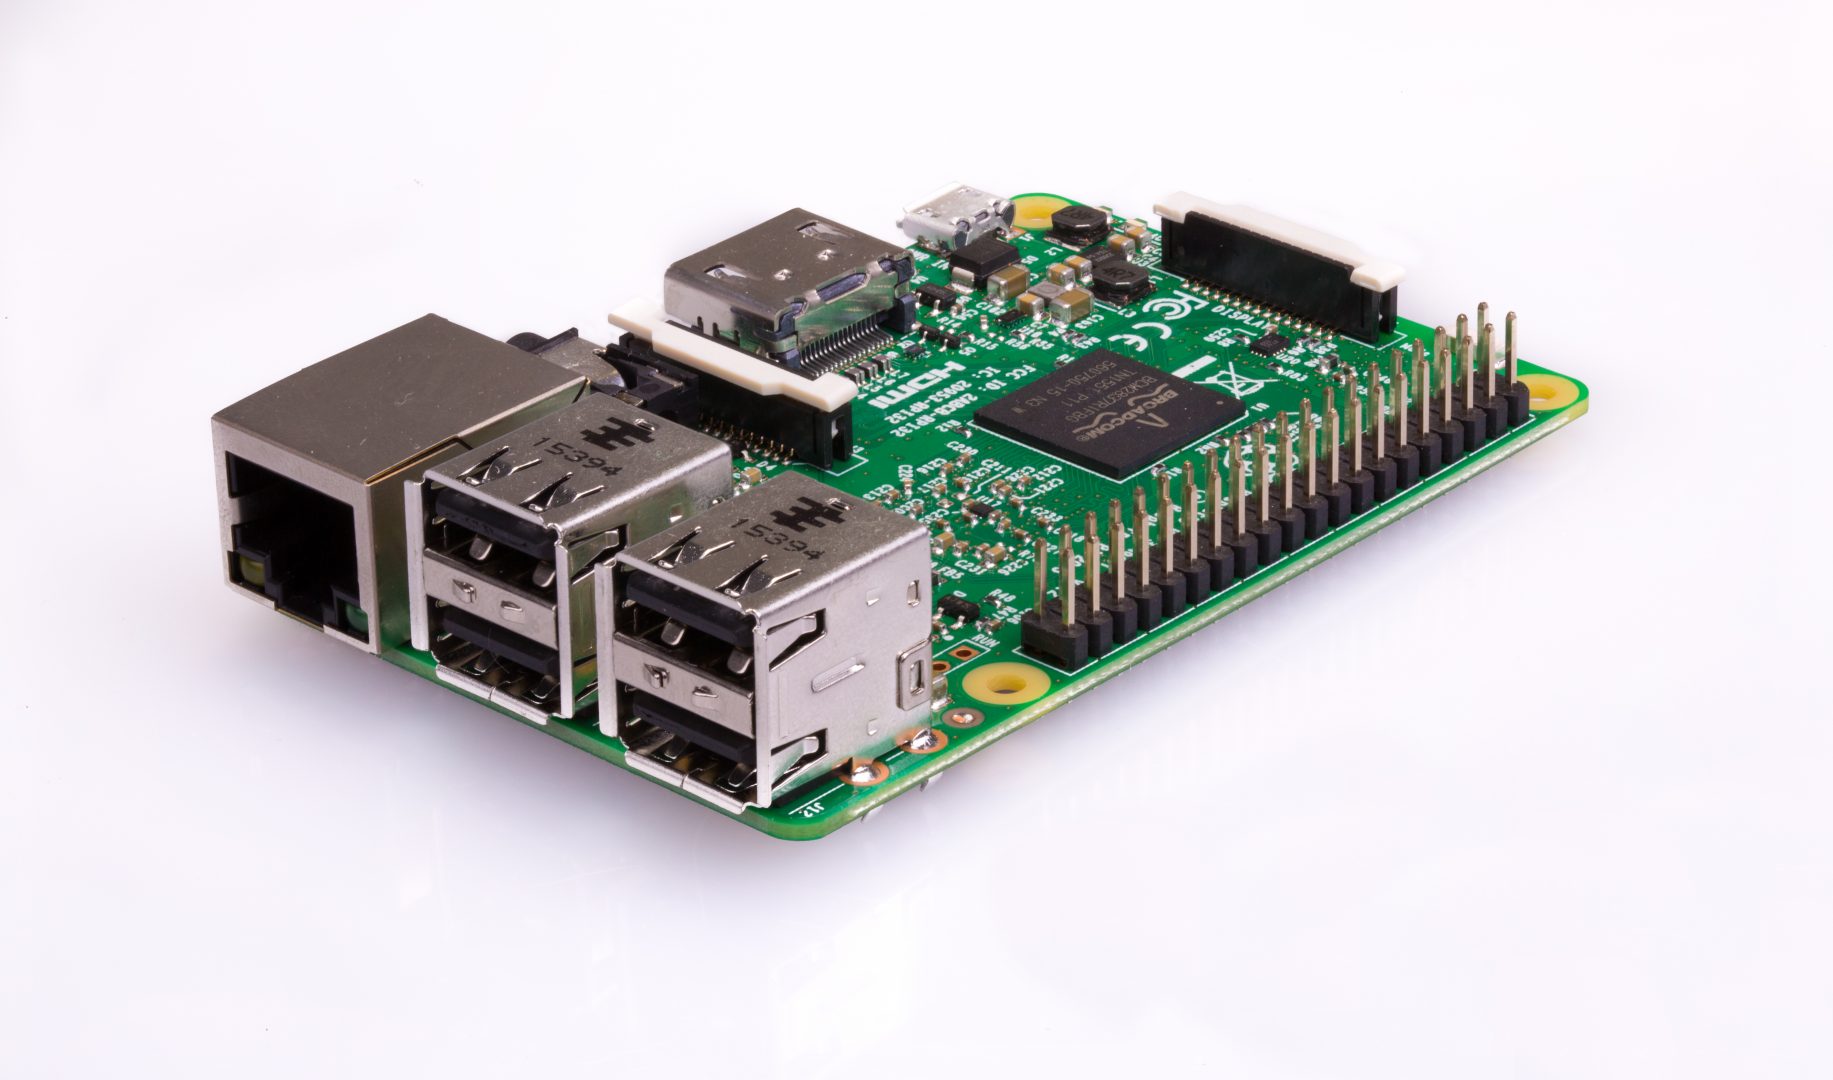
The Raspberry Pi comes as an exposed circuit board, so I recommend getting a case to protect it. For my Raspberry Pi 4 Model B I used an aluminum case from Geekworm that doubles as a heat sink, but there are dozens of less expensive less expensive options available from multiple vendors that work fine. Just be sure to get one that’s designed for your exact model of Raspberry Pi, since the naming can be a bit confusing and there are minor differences in layout between the models.
If you’re having trouble finding a Raspberry Pi and you don’t want to wait, there are several other single-board computer options available that support the software I’ll be discussing, including the ODROID-C4, ODROID-HC4, ROCK64 and ROCKPro64. I’ve used several of these boards for other projects in the past, but I’ve only used a Raspberry Pi for the systems I’m discussing in this article. If you decide to use one of the alternative boards you may have to do some research on your own if you run into any problems.
The next item on the list is a workstation – a laptop or PC of some kind. For a disaster scenario, I prefer a laptop since most of them can be powered with an optional 12V car adapter or even from a USB-C port, and they’re a lot easier to store, transport and protect than a full-size desktop computer. For the initial setup you’re going to need a Windows, MacOS or Linux system to prepare the Raspberry Pi, but for the actual deployed operational environment you can also use less expensive Chromebooks if you want. You can find refurbished Chromebooks for around $50 and a decent refurbished Windows laptop for under $200 if you don’t already have one. Apple laptops tend to be a lot more expensive and I don’t have any experience with those, but you can use one if you want.
If you have an older Windows laptop you can potentially breathe some new life into it by replacing Windows with Linux. If you don’t currently own a laptop or computer and you plan on just using an inexpensive Chromebook for a workstation in your deployed environment after a disaster, you can rent a Windows laptop computer for around $25/week at someplace like Rent-A-Center to do the initial set up and configuration. If your laptop doesn’t have a built-in microSD card reader you’re also going to need an external microSD adapter for the workstation so you can load the operating system and application for the Raspberry Pi onto the microSD card.
As with the Raspberry Pi I recommend you connect your PC workstation to the disaster network using a physical Ethernet cable instead of WiFi, so if your laptop doesn’t have have an Ethernet network port you can get an inexpensive USB Ethernet adapter (probably the same one I recommended above for the Raspberry Pi 3 Model A+). Using Ethernet is optional – connecting your workstation to your disaster network via WiFi will also work.